How to Build a Compact Wooden Blanket Ladder for Small Spaces

How to Build a Compact Wooden Blanket Ladder for Small Spaces

Building a Compact Wooden Blanket Ladder for Small Spaces

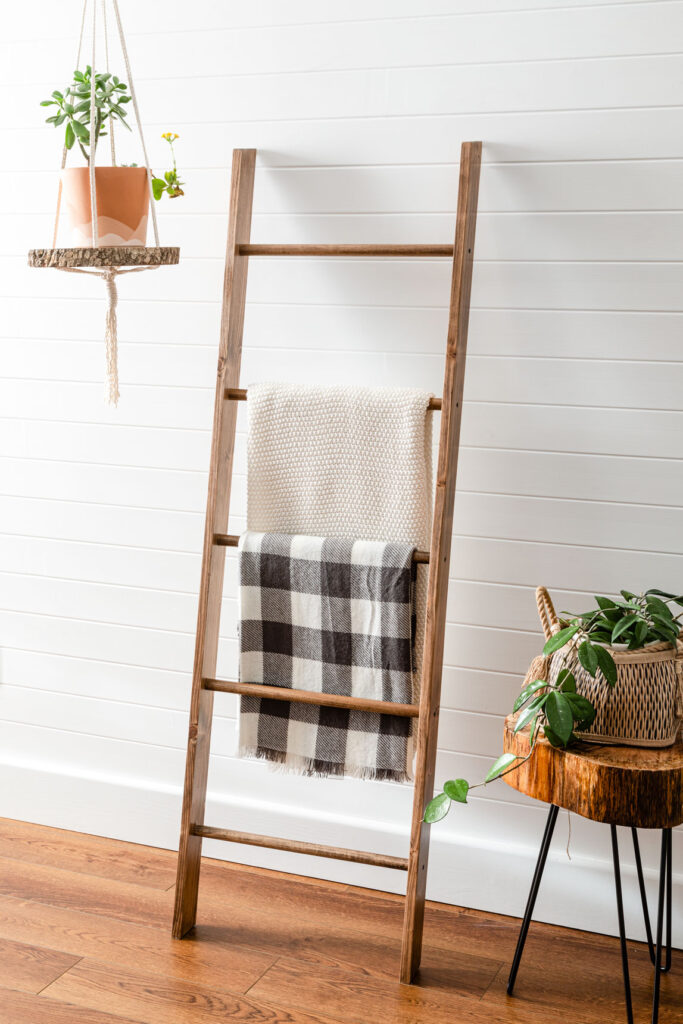
In the quest for a clutter-free and stylish home, maximizing space is paramount. A blanket ladder is a brilliant solution for small spaces, providing a functional and decorative way to store blankets, throws, and towels. This guide will walk you through the process of building a compact wooden blanket ladder, perfect for any room in your home.

Gather Your Supplies

Before you begin, make sure you have all the necessary materials. This will ensure a smooth and efficient building process.

Materials:

  • Two 1x4 boards (8 feet long) for the sides
  • Six 1x2 boards (4 feet long) for the rungs
  • Wood glue
  • Wood screws (2-inch)
  • Sandpaper (fine grit)
  • Wood stain or paint (optional)
  • Measuring tape
  • Level
  • Saw (circular or hand saw)
  • Drill with screwdriver bit
  • Clamps

Instructions for Building Your Blanket Ladder

Let's get started! This process will involve a series of steps, but with clear instructions, you can easily follow along.

Step 1: Cut the Wood

Start by cutting the boards to size. Use your saw to cut the two 1x4 boards to the desired height of your ladder. For a compact ladder, consider a height of 4-5 feet. Now cut the six 1x2 boards to the desired length for your rungs. A standard rung length is 10-12 inches, but adjust according to your preference.

Step 2: Assemble the Ladder Sides

Measure and mark the locations for the rungs on the 1x4 boards. Ensure the spacing is even. Apply a thin layer of wood glue to the marked spots on both sides. Now, place the 1x2 boards (rungs) onto the glued spots.

Step 3: Secure the Rungs

Use wood screws to securely attach the rungs to the sides. Pre-drill pilot holes to prevent the wood from splitting. Drive the screws through the sides and into the rungs.

Step 4: Sand and Finish

Once assembled, sand the entire ladder surface with fine-grit sandpaper to create a smooth finish. This will eliminate any rough edges and ensure a professional look.

Step 5: Stain or Paint (Optional)

If you want to add a touch of personality to your ladder, you can stain or paint it. Apply the chosen finish according to the manufacturer's instructions. Allow the finish to dry completely.

Tips for Success

Building a compact wooden blanket ladder is a rewarding project. Here are a few tips to ensure success:

  • Use a level to ensure the rungs are perfectly aligned and the ladder is stable.
  • Clamp the rungs in place while securing them with screws to prevent movement.
  • Use a good quality wood glue for strong, durable bonds.
  • Sand the wood thoroughly before staining or painting for a smooth, even finish.
  • For a rustic look, consider using reclaimed wood for the sides and rungs.
  • Get creative and experiment with different finishes or add decorative elements to personalize your ladder.

Conclusion

Building a compact wooden blanket ladder is a simple yet rewarding project that will add functionality and style to your home. With a few basic tools and materials, you can create a beautiful and practical storage solution for your blankets, throws, and towels. Enjoy the process and admire your handy work as you create a clutter-free and cozy space.

Share:

How to Build Wooden Lawn Chairs with a Modern or Rustic Look

How to Build Wooden Lawn Chairs with a Modern or Rustic Look

Building Wooden Lawn Chairs: Modern and Rustic Designs

Looking to add a touch of comfort and style to your outdoor space? Building your own wooden lawn chairs is a rewarding project that allows you to express your creativity and personalize your backyard. Whether you prefer a sleek modern aesthetic or a cozy rustic charm, this guide will walk you through the process of crafting durable and eye-catching chairs.

Modern Lawn Chairs: Sleek Lines and Minimalism

Modern lawn chairs emphasize clean lines, simple forms, and a focus on functionality. To achieve this look, choose hardwoods like walnut, oak, or maple for their strength and natural beauty. Consider using a minimalist design with a single piece of wood for the seat and back, or explore geometric shapes for a bold statement.

Planning Your Design

Start by sketching out your desired chair design. Think about the overall shape, the angle of the seat and back, and the height of the chair. For a modern aesthetic, avoid excessive curves or ornate details. Aim for clean, straight lines and a balanced silhouette.

Cutting and Shaping

Once you have your design finalized, use precise measurements to cut the wood for each part of the chair. A table saw is ideal for accurate cuts, but you can also use a handsaw if necessary. Use sandpaper to smooth the edges and create a polished finish.

Assembly and Finishing

Assemble the chair using strong wood glue and screws or dowels. For a minimalist look, choose concealed fasteners or countersinking screws for a flush finish. Sand the entire chair again to ensure a smooth surface before applying a clear sealant or stain. Choose a natural finish that enhances the wood's grain and texture.

Rustic Lawn Chairs: Warmth and Character

Rustic lawn chairs embrace a sense of natural charm and weathered beauty. Use reclaimed wood, knotty pine, or cedar for their unique character and rustic appeal. Explore designs with wide arms, curved backs, and traditional joinery techniques for a timeless look.

Embrace the Imperfections

When working with reclaimed wood, embrace the knots, cracks, and variations in color. These imperfections add to the rustic charm and tell the story of the wood's past. Choose a design that highlights these features rather than trying to hide them.

Traditional Joinery Techniques

For a truly rustic feel, explore traditional joinery techniques like mortise and tenon joints or dovetail joints. These methods not only add strength and durability but also create a beautiful aesthetic. Research these techniques online or through woodworking books to learn the proper methods.

Finishing Touches

For a rustic finish, consider using a natural oil or wax to enhance the wood's texture and color. You can also leave the wood untreated for a more weathered look. Consider adding a few decorative details, such as a hand-carved design or a leather strap for the back.

Essential Tools and Materials

Before you begin, gather the following tools and materials:

  • Wood (hardwood or softwood, depending on your design)
  • Table saw or handsaw
  • Sandpaper (various grits)
  • Wood glue
  • Screws or dowels
  • Screwdriver or drill
  • Clamps
  • Measuring tape and pencil
  • Safety glasses and gloves
  • Finishing product (clear sealant, stain, oil, wax)

Tips for Success

  • Plan your design carefully. Sketch out your chair and consider the measurements and joinery techniques before you start cutting.
  • Use high-quality wood. The longevity and stability of your chairs depend on the quality of the wood you choose.
  • Sand thoroughly. Smooth surfaces create a more comfortable seating experience and a polished look.
  • Securely fasten all parts. Use strong glue and appropriate fasteners to ensure your chair is sturdy and safe.
  • Finish with care. Apply a sealant or stain evenly to protect the wood and enhance its natural beauty.

Building your own wooden lawn chairs is a rewarding and creative project. By following these steps and embracing your personal style, you can create unique and comfortable chairs that will enhance your outdoor space for years to come.

Share:

Key Rack Projects That Will Add Style and Function to Any Home

Key Rack Projects That Will Add Style and Function to Any Home

Key Rack Projects That Will Add Style and Function to Any Home

A key rack is more than just a place to hang your keys. It’s a functional piece of décor that can add style and organization to any home. Whether you prefer a sleek and modern design or a rustic and charming aesthetic, there’s a key rack out there that's perfect for you. And the best part? Many key rack projects are surprisingly easy to DIY, allowing you to personalize your home with your own unique touch.

DIY Key Rack Ideas

The possibilities for creating a DIY key rack are endless. Here are some ideas to inspire your next project:

1. Repurposed Wood Key Rack

Give old wood a new life by transforming it into a stylish key rack. Use reclaimed wood planks, pallet boards, or even an old door. Sand the wood smooth, stain or paint it to your liking, and attach hooks or knobs. You can even add a small shelf for other small items like mail or sunglasses.

Here’s a simple guide to get started:

  1. Choose a piece of wood that’s the right size and shape for your space.
  2. Sand the wood and apply a sealant or stain to protect it.
  3. Drill holes for your hooks or knobs, making sure they are spaced evenly.
  4. Screw in the hooks or knobs.
  5. Hang your new key rack on the wall.

2. Metal Pipe Key Rack

Industrial chic meets practicality with a metal pipe key rack. This modern design is simple yet striking. You can use copper, black iron, or galvanized pipe, and add accents like leather straps or wooden shelves for a personalized touch. You can find all the necessary materials at your local hardware store.

Here’s a breakdown of the steps involved:

  1. Cut the pipe to the desired length.
  2. Attach the pipe to the wall using brackets or flanges.
  3. Add hooks or knobs to the pipe.
  4. Hang your key rack on the wall.

3. Decorative Tile Key Rack

Add a touch of whimsy and color to your entryway with a decorative tile key rack. Choose tiles that reflect your style, from classic subway tiles to vibrant Moroccan patterns. You can simply adhere the tiles to a wooden board or create a more elaborate mosaic design.

Here’s how to create a decorative tile key rack:

  1. Choose your tiles and design.
  2. Cut the tiles to fit your design if necessary.
  3. Adhere the tiles to a wooden board using tile adhesive.
  4. Allow the adhesive to dry completely before adding hooks or knobs.
  5. Hang your key rack on the wall.

4. Branch Key Rack

Embrace the beauty of nature by incorporating a branch into your key rack design. Find a sturdy branch with unique curves and character. Clean the branch thoroughly, sand it smooth, and add hooks or knobs. You can leave the branch in its natural state or paint it for a bolder look.

Here’s a guide for making a branch key rack:

  1. Choose a branch that’s the right size and shape for your space.
  2. Clean and sand the branch thoroughly.
  3. Attach hooks or knobs to the branch using screws or nails.
  4. Mount the branch to the wall using brackets or hooks.

Key Rack Styles and Trends

Beyond the DIY options, there are numerous pre-made key racks available in various styles. Here are some popular trends:

1. Minimalist Key Racks

For those who prefer clean lines and simple designs, minimalist key racks are a perfect choice. These often feature geometric shapes, sleek metals, and understated colors. Minimalist key racks can be found in various materials, from wood and metal to acrylic and ceramics.

2. Rustic Key Racks

Embrace the warmth and charm of rustic style with a key rack made from natural materials like wood, leather, or metal. These key racks often feature distressed finishes, knots, and other natural imperfections that contribute to their unique character. Rustic key racks are perfect for adding a touch of farmhouse or cabin aesthetic to your home.

3. Farmhouse Key Racks

Farmhouse style is all about creating a cozy and inviting atmosphere, and a key rack can be a great way to incorporate this aesthetic into your entryway. Farmhouse key racks are often made from wood and feature simple designs with rustic elements, such as galvanized metal accents or reclaimed wood.

4. Industrial Key Racks

If you’re drawn to the industrial aesthetic, a key rack made from metal pipes, reclaimed wood, or other industrial materials is a great option. These key racks often feature exposed hardware, raw finishes, and bold accents. Industrial key racks can add a touch of urban edge to any space.

Choosing the Right Key Rack for Your Home

When selecting a key rack for your home, consider the following factors:

  • Style: Choose a key rack that complements your home’s overall design style.
  • Size: Select a key rack that is appropriate for the space where you plan to hang it.
  • Material: Choose a key rack made from a material that is durable and easy to clean.
  • Functionality: Consider the number of hooks you need and whether you want additional features, such as a shelf or mail organizer.
  • Budget: Key racks come in a wide range of prices, so set a budget before you start shopping.

Conclusion

A key rack is a practical and stylish addition to any home. It provides a designated spot for your keys, helping you stay organized and prevent lost keys. Whether you choose to create a DIY key rack or purchase one from a store, there are countless options available to suit your taste and budget. So get creative and choose a key rack that will enhance the functionality and aesthetics of your entryway.

Share:

DIY Floating Shelves with Easy-to-Follow Instructions

DIY Floating Shelves with Easy-to-Follow Instructions

DIY Floating Shelves: A Simple Guide to Stylish Storage

Tired of bulky bookshelves and cluttered walls? Floating shelves are a stylish and practical solution for adding storage and visual interest to any room. They're surprisingly easy to build, and with this step-by-step guide, you'll be showcasing your favorite belongings in no time.

Choosing Your Materials and Tools

Before you start, gather your materials and tools. You'll need:

  • Wooden boards (select the desired length, width, and thickness)
  • Brackets (make sure they are designed for floating shelves and compatible with your wall type)
  • Screws (matching the size and type of your brackets and wood)
  • Measuring tape
  • Level
  • Pencil
  • Drill with drill bits (for pilot holes and securing the brackets)
  • Saw (optional, for customizing board size)
  • Sandpaper (for smoothing edges and finishing the boards)
  • Wood stain or paint (optional, for a personalized look)

Step-by-Step Instructions

1. Measure and Mark

Decide where you want your shelf to be placed. Use a measuring tape to mark the desired height on the wall. Consider factors like existing furniture and the weight you'll be putting on the shelf.

2. Install the Brackets

Hold the bracket up to the marked spot and level it using the level tool. Mark the screw holes with a pencil. Drill pilot holes into the wall (slightly smaller than the screw size) to avoid splitting the wall material. Attach the brackets securely using the screws.

3. Prepare the Shelf Board

If necessary, cut the board to your desired size using a saw. Sand the edges of the board to create a smooth finish.

4. Stain or Paint (Optional)

If you want to add a touch of color or a natural finish, now is the time to stain or paint your shelf board. Let it dry completely before moving on.

5. Install the Shelf Board

Carefully slide the shelf board onto the brackets. Make sure it sits level. It may be helpful to have someone hold the shelf in place while you attach it to the brackets. Attach the shelf to the brackets with screws, ensuring they are securely fastened.

Finishing Touches and Safety Tips

Once your shelf is installed, take a moment to admire your handiwork! You can personalize it by adding decorative elements like corner brackets or by creating a cohesive display of your favorite items.

Here are some safety tips to keep in mind:

  • Always use the appropriate drill bits and screws for your project.
  • Check your brackets' weight limits and ensure your shelf and items do not exceed them.
  • If you're unsure about installing the shelves yourself, consult a professional.

Floating shelves offer a simple yet elegant way to enhance your home's decor and storage solutions. Enjoy the satisfaction of creating something beautiful and functional with your own hands!

Share:

Children's Jewelry Box: A Fun and Creative Woodworking Gift

Children's Jewelry Box: A Fun and Creative Woodworking Gift

Children's Jewelry Box: A Fun and Creative Woodworking Gift

Hey there, woodworking enthusiasts! Ever thought about making a special gift for a little one in your life? A jewelry box is always a thoughtful present, and crafting one from wood adds a touch of personal charm. Let's dive into this project, where we'll combine basic woodworking skills with some creative flair to build a unique and cherished treasure.

Why Choose a Wood Jewelry Box?

Wood is a timeless material that evokes warmth and natural beauty. A wooden jewelry box can become a special keepsake that will be cherished for years to come. Imagine a little girl opening her very own box, filled with her precious trinkets, each time feeling a sense of joy and ownership. Plus, the process of building it together can be a fantastic bonding experience for you and your child.

Designing Your Little Gem

Before we get our hands dirty, let's brainstorm some ideas. There are endless possibilities when it comes to designing a child's jewelry box. Consider these questions to get your creative juices flowing:

What's Their Style?

Think about their favorite colors, animals, characters, or themes. Maybe they love princesses, dinosaurs, or superheroes. Incorporate those elements into the design.

What Size is Right?

A small box is perfect for a young child's first collection of jewelry. For older children, a slightly larger size might be more appropriate. Consider their current jewelry collection and future needs.

What Features Would They Love?

Add some fun features like a mirror, compartments for different types of jewelry, a drawer for secret treasures, or a built-in lock with a key.

Tools and Materials

Let's gather the essentials for our project. You'll need the following tools and materials:

  • Woodworking saw (hand saw, jigsaw, or circular saw)
  • Sandpaper (various grits)
  • Hammer
  • Screwdriver
  • Clamps
  • Wood glue
  • Measuring tape
  • Pencil
  • Wood (consider plywood, pine, or cedar)
  • Hardware (hinges, drawer slides, lock and key)
  • Paint or stain (optional)
  • Decorative embellishments (stickers, gems, buttons)

Building the Box

Now, let's get our hands dirty and build the jewelry box itself!

Cutting the Pieces

Based on your design, cut the pieces of wood to size. Make sure to double-check your measurements before cutting, as you can't glue back pieces that are too short. You'll likely need these basic pieces:

  • Bottom panel
  • Two side panels
  • Two end panels
  • Top panel (optional - if you want a hinged lid)
  • Drawer front, back, and sides (if adding a drawer)

Assembling the Box

1. Glue and clamp the side panels to the bottom panel. Make sure the seams are flush and even. Use clamps to hold everything securely in place until the glue dries. Repeat this process for the end panels.

2. If you're adding a hinged lid, attach it to the top of the box using hinges. Choose hinges that match the style of the box and ensure they are secured with screws.

3. If you're building a drawer, assemble it separately by gluing and clamping the drawer front, back, and sides together. Let the glue dry completely before attaching the drawer slides.

4. Once the glue has dried, carefully remove the clamps and sand down any rough edges to create a smooth surface.

Adding Personal Touches

Now comes the fun part: customizing your jewelry box to reflect the child's unique personality. Think of this as a blank canvas waiting to be painted with their own flair.

Painting or Staining

Apply a coat of paint or stain to the box, letting it dry completely. Choose colors that complement the theme or personalize it with a fun design using paint pens or stencils.

Decorative Embellishments

Add a sprinkle of magic with decorative embellishments. Stick on gems, glitter, or create a whimsical scene with colorful stickers. If you're feeling adventurous, consider decoupage with patterned paper or fabric to create a unique and textured finish.

Finishing Touches

Attach a mirror to the inside of the lid for a touch of glamour. Add compartments for different types of jewelry by using dividers or small boxes. Consider incorporating a lock and key for a sense of privacy and security.

Presenting Your Treasure

Now, your handcrafted wooden jewelry box is ready to be gifted! Present it with a flourish, maybe with a few small, sparkly items inside to get the child excited about its possibilities. As they open their brand-new box, you'll see their eyes sparkle with joy and wonder.

Beyond Jewelry

This project isn't limited to just jewelry. You can adapt the design and add features for other types of treasures. Create a box for collecting seashells, stamps, or even a special collection of tiny toys. The possibilities are endless, just like the joy of creating something special for a child you love.

So, gather your tools, let your imagination run wild, and get ready to embark on a rewarding woodworking adventure. Building a wooden jewelry box is not just about creating a beautiful gift, it's about building memories that will last a lifetime.

Share:

Unforgettable Woodworking Gifts for the Holidays

Unforgettable Woodworking Gifts for the Holidays

Unforgettable Woodworking Gifts for the Holidays

The holiday season is a time for giving, and what better way to show your loved ones you care than with a thoughtful and personalized gift? For the woodworking enthusiast in your life, a gift that reflects their passion and creativity can be truly cherished. This year, go beyond the usual gift cards and consider something unique and handmade. Here are some unforgettable woodworking gifts that are sure to make their holiday brighter.

Tools and Supplies

Woodworkers are always looking for new tools and supplies to add to their collection, and a thoughtful gift in this category can be a game-changer. Here are some ideas:

High-Quality Hand Tools

A well-crafted hand tool is an investment that will last a lifetime. Consider a premium chisel set, a Japanese pull saw, or a finely crafted wood plane.

  • Chisel Set: A set of high-quality chisels is essential for any woodworker. Look for chisels made from hardened steel and with comfortable handles.
  • Japanese Pull Saw: Japanese pull saws are known for their sharpness and precision. They are great for making fine cuts and can be a valuable addition to any woodworking toolkit.
  • Wood Plane: A wood plane is a versatile tool that can be used to smooth wood, create bevels, and shape edges. Consider a hand plane or a block plane.

Power Tools

For the woodworker who enjoys power tools, a new tool can be a welcome addition. Consider a cordless drill/driver, a random orbital sander, or a jigsaw.

  • Cordless Drill/Driver: A cordless drill/driver is a must-have for any woodworker. Look for a model with a powerful motor and a long battery life.
  • Random Orbital Sander: A random orbital sander is great for smoothing and finishing wood. Look for a sander with a variety of sanding discs and a dust collection system.
  • Jigsaw: A jigsaw is a versatile tool that can be used to cut intricate shapes and curves in wood. Look for a jigsaw with a variable speed setting and a blade change system.

Specialty Woodworking Supplies

Beyond the basics, there are many specialized woodworking supplies that can be appreciated by even the most experienced woodworker. Consider a set of high-quality woodturning tools, a set of carving chisels, or a premium wood finishing kit.

  • Woodturning Tools: If your woodworking enthusiast enjoys turning, a set of high-quality woodturning tools can be a great gift. Look for a set that includes a variety of gouges, chisels, and scrapers.
  • Carving Chisels: For woodcarving enthusiasts, a set of carving chisels can be a valuable addition to their toolkit. Look for chisels made from high-carbon steel with comfortable handles.
  • Wood Finishing Kit: A premium wood finishing kit can help woodworkers achieve stunning results. Look for a kit that includes a variety of stains, finishes, and applicators.

Personalized Woodworking Gifts

For a truly unique and memorable gift, consider something personalized that reflects the woodworker's individual style and interests. Here are some ideas:

Custom Engraved Tools

Add a personal touch to their favorite tools by having them engraved with their name, initials, or a special message.

Personalized Workshop Sign

Create a custom workshop sign with their name, a meaningful quote, or a design that reflects their woodworking style. You can even include a special message about their woodworking journey.

Customized Woodworking Apron

A personalized woodworking apron can be both practical and stylish. You can have it engraved with their name, initials, or a design that reflects their woodworking style.

Wooden Toolbox or Tool Caddy

A well-crafted wooden toolbox or tool caddy can be a practical and beautiful addition to any woodworker's workspace. You can customize it by adding a personal touch with an engraved name or inscription.

Experiences and Classes

For the woodworker who is always looking to learn and grow, an experience or a class can be a wonderful gift. Here are some ideas:

Woodworking Class or Workshop

A woodworking class or workshop can provide them with new skills and techniques. There are classes available in a wide range of woodworking styles, from basic carpentry to advanced furniture making.

Visit to a Woodworking Show or Exhibition

A trip to a woodworking show or exhibition can provide them with inspiration and exposure to new tools, techniques, and materials.

Membership to a Woodworking Club or Association

A membership to a woodworking club or association can provide them with access to a community of like-minded individuals, shared resources, and educational opportunities.

Handmade Woodworking Gifts

If you have the skills and time, you can create a truly special and unforgettable gift by making something yourself. Here are some ideas:

Wooden Cutting Board

A beautifully crafted wooden cutting board is a practical and timeless gift. Choose a high-quality wood like walnut, cherry, or maple, and personalize it with a custom design or engraving.

Wooden Serving Tray

A wooden serving tray is a versatile and elegant gift that can be used for everything from serving drinks and snacks to displaying decorative items. You can create a custom design to reflect the recipient's style.

Wooden Jewelry Box

A wooden jewelry box is a beautiful and practical gift for a woman in your life. You can personalize it with a decorative design, an engraved inscription, or a special finish.

Wooden Picture Frame

A wooden picture frame is a simple yet meaningful gift that can be personalized with a custom design, an engraved message, or a special wood finish.

Remember, a woodworking gift doesn't have to be expensive to be meaningful. It's the thoughtfulness and personal touch that will make it truly unforgettable. Happy holidays!

Share:

Woodworking Gifts for Him: Unique and Manly Creations

Woodworking Gifts for Him: Unique and Manly Creations

Woodworking Gifts for Him: Unique and Manly Creations

Searching for the perfect gift for the man in your life who loves woodworking? Look no further than a handcrafted wooden creation! Woodworking gifts are not only practical but also thoughtful and personalized, showcasing your care and attention to detail. From functional tools to stunning home decor, there's a woodworking gift for every taste and budget. Let's explore some unique and manly creations that are sure to impress.

Practical and Useful Woodworking Gifts

For the woodworking enthusiast who appreciates tools and practicality, consider these functional gifts that will enhance his workshop and projects:

Personalized Tool Caddy

A custom-made tool caddy is a practical and stylish way to keep his tools organized and within reach. Choose a durable wood like walnut or cherry and personalize it with his initials or a meaningful message. This gift will be a cherished addition to his workshop and a reminder of your thoughtfulness.

Custom-Made Ruler or Tape Measure

Upgrade his measuring tools with a personalized wooden ruler or tape measure. Choose a sleek design and engrave his name or initials for a truly unique gift. This practical gift will be a constant reminder of your love and support.

Handcrafted Mallet or Hammer

A beautifully crafted mallet or hammer is a statement piece for any woodworking enthusiast. Opt for a durable hardwood like hickory or maple and consider adding custom engravings or a unique handle design. This gift is both practical and visually appealing, making it a perfect addition to his tool collection.

Stylish and Decorative Woodworking Gifts

For the man who appreciates the beauty of wood and enjoys creating unique pieces for his home, these decorative gifts are sure to make a lasting impression:

Personalized Wooden Wall Clock

A custom-made wooden wall clock is a stylish and functional gift that adds character to any room. Choose a wood species that complements his decor and personalize it with his initials or a meaningful quote. The intricate craftsmanship and personalization make it a truly special gift.

Hand-Carved Wooden Sculpture

A hand-carved wooden sculpture is a unique and artistic gift that shows your appreciation for his creativity. Choose a subject matter that resonates with his interests, such as wildlife, abstract art, or nautical themes. The intricate details and craftsmanship make it a statement piece for his home.

Wooden Wine Rack or Bottle Holder

For the wine enthusiast, a handcrafted wooden wine rack or bottle holder is a stylish and functional gift. Choose a rustic or modern design and personalize it with his initials or a special date. This unique piece will elevate his wine collection and showcase his refined taste.

Experiential Woodworking Gifts

For the man who enjoys hands-on activities and learning new skills, consider these experiential woodworking gifts:

Woodworking Class or Workshop

Gift him the opportunity to learn new woodworking skills or enhance his existing ones. Look for local woodworking classes or workshops that cater to his interests and skill level. This experiential gift allows him to expand his creativity and enjoy a new passion.

Woodworking Tool Subscription Box

A woodworking tool subscription box delivers a curated selection of high-quality tools and materials right to his doorstep. Each box includes a variety of tools and projects, allowing him to explore new techniques and expand his skillset.

Woodworking Book or Magazine Subscription

For the man who loves to learn, a woodworking book or magazine subscription provides him with access to a wealth of knowledge and inspiration. Choose books or magazines that align with his interests and skill level, providing him with new ideas and techniques to explore.

Personalized and Thoughtful Touches

To elevate your woodworking gift and make it truly special, consider adding personalized touches:

Engraved Messages

Engrave his name, initials, or a meaningful message onto the wood. This personal touch adds a sentimental value to the gift and shows your thoughtfulness.

Custom-Made Design

If you have woodworking skills, consider creating a custom-made gift based on his interests and preferences. This personalized touch will be a cherished keepsake that he will treasure for years to come.

Matching Gift Set

Pair the woodworking gift with complementary items, such as a set of high-quality chisels, a personalized apron, or a custom-made toolbox. This creates a thoughtful and coordinated gift set that he will appreciate.

Considerations for Choosing the Perfect Woodworking Gift

When choosing a woodworking gift, consider the following factors:

  • His woodworking level: Choose a gift that matches his experience and skill level. Avoid overly complex projects for beginners and opt for challenging tasks for seasoned woodworkers.
  • His woodworking interests: Consider his preferred wood species, tools, and projects. Does he enjoy furniture making, carving, or turning?
  • His personal style: Choose a gift that complements his home decor and personal taste. Does he prefer rustic, modern, or traditional styles?
  • Your budget: Woodworking gifts can range in price from affordable to extravagant. Set a budget and find a gift that fits within your financial constraints.
  • Remember, the best woodworking gift is one that reflects your understanding of his passions and interests. Whether you choose a practical tool, a decorative piece, or an experiential experience, a handcrafted wooden creation is a thoughtful and meaningful gift that he will cherish for years to come.

    Share:

    Elegant Wooden Gift Ideas for Every Taste

    Elegant Wooden Gift Ideas for Every Taste

    Elegant Wooden Gift Ideas for Every Taste

    Looking for a gift that exudes both beauty and thoughtfulness? Look no further than the timeless elegance of wood. From practical home decor to unique statement pieces, wooden gifts cater to diverse tastes and leave a lasting impression. Let's explore a curated selection of wooden gift ideas that will enchant and inspire your recipient.

    For the Homebody

    Nestled in the cozy embrace of home, the homebody appreciates gifts that enhance their sanctuary. Wooden accents infuse warmth and natural charm into any space. Consider:

    Wooden Serving Trays

    Elevate snack time with a handcrafted wooden serving tray. Choose from rich walnut, rustic oak, or sleek maple to complement their existing décor. A personalized engraving adds a touch of exclusivity, making it a treasured keepsake.

    Wooden Candle Holders

    A wooden candle holder provides a warm glow and elevates the ambiance of any room. Choose from minimalist designs or intricate carvings, each offering its own unique charm. Opt for a set of varying heights for a visually striking display.

    For the Culinary Enthusiast

    A passion for food is best nurtured with tools that inspire creativity and elevate culinary experiences. Wooden gifts for the kitchen speak to the heart of the home cook.

    Wooden Cutting Boards

    A well-crafted wooden cutting board is both a functional and aesthetically pleasing addition to any kitchen. Choose from various sizes and shapes, from compact charcuterie boards to expansive work surfaces. Consider adding a personalized inscription for a thoughtful touch.

    Wooden Utensil Sets

    A set of wooden spoons, spatulas, and stirring tools adds a touch of rustic charm to the kitchen. Choose from different wood species, each offering unique texture and grain patterns. These durable tools are a joy to use and will be treasured for years to come.

    For the Nature Lover

    Connect with the beauty of nature by gifting a wooden treasure that celebrates the outdoors. These gifts bring the serenity of nature indoors.

    Wooden Birdhouses

    A handcrafted wooden birdhouse is a delightful gift for a nature enthusiast. Choose from whimsical designs or rustic styles to complement their garden. A personalized inscription adds a personal touch, making it a cherished keepsake.

    Wooden Planters

    A wooden planter adds a touch of natural elegance to any indoor or outdoor space. Choose from various sizes and shapes, from compact hanging planters to stately floor-standing designs. Add a thoughtful plant or a packet of seeds for a complete gift set.

    For the Traveler

    For the adventurous spirit who explores new horizons, a wooden gift embodies the essence of wanderlust. These gifts inspire memories and spark a sense of adventure.

    Wooden Travel Journal

    A wooden travel journal provides a unique and personal space for documenting adventures. Choose from various sizes and finishes, each with its own distinct character. Encourage them to jot down travel anecdotes, memories, and reflections.

    Wooden Luggage Tags

    A personalized wooden luggage tag adds a touch of individuality to their travel gear. Choose from classic designs or unique engravings to create a distinctive piece that complements their style. It's a practical and stylish way to keep their belongings safe and identifiable.

    From the warmth of a handcrafted wooden serving tray to the enduring beauty of a personalized travel journal, wooden gifts offer a touch of timeless elegance and enduring charm. These thoughtful presents resonate with a diverse range of tastes and leave a lasting impression on the recipient. Discover the perfect wooden gift and watch as it becomes a cherished treasure.

    Share:

    How to Create a Sturdy Firewood Rack with Pallets

    How to Create a Sturdy Firewood Rack with Pallets

    Build a Sturdy Firewood Rack Using Recycled Pallets

    Transform those neglected pallets into a functional and rustic firewood rack! This project allows you to reclaim materials and create a storage solution that complements your outdoor space. You'll learn how to safely dismantle pallets, cut and assemble the wood, and add a touch of personal style. Let's get started.

    Gather Your Materials

    Before you start, gather these essential materials:

    • 2-3 Sturdy Pallets: Choose pallets with solid wood construction, avoiding damaged or warped pieces.
    • Safety Gear: Wear gloves, eye protection, and sturdy closed-toe shoes for safety during dismantling and cutting.
    • Hand Saw or Circular Saw: Use a saw suitable for cutting wood.
    • Hammer and Nails: For securing the rack together.
    • Screwdriver or Drill: For fastening optional screws for extra stability.
    • Wood Stain or Paint: (Optional) To enhance the look of your rack.
    • Measuring Tape: To ensure accurate cuts.
    • Level: For aligning the rack.
    • Clamps: (Optional) To hold pieces together while securing them.

    Disassemble the Pallets Safely

    Safety first! Wear your safety gear and use caution when dismantling the pallets. Begin by removing any nails or staples using a hammer or pliers. Then, gently pry apart the boards using a crowbar or heavy-duty tool, working your way from the outside to the center. Check each board for damage and discard any weak or cracked pieces.

    Plan Your Rack Design

    Consider the size and shape of the rack based on your space and firewood needs. A simple three-tier rack is easy to build and provides ample storage. Measure the desired width and height of your rack and mark the boards accordingly.

    Creating the Base

    You'll use two pallet boards to make the base of your rack. Position them parallel to each other, leaving a gap between them to accommodate the width of your firewood. Secure them together with nails or screws, ensuring a sturdy base.

    Building the Uprights

    For the vertical supports of your rack, select boards with a height matching your desired rack height. Cut them to size and attach them to the base using nails or screws. Make sure they're positioned at equal distances apart to create a balanced and stable structure.

    Adding the Tiers

    Cut additional pallet boards to the length needed for your tiers. These will be placed horizontally between the uprights, creating the storage shelves for your firewood. Secure them with nails or screws, ensuring they are level and evenly spaced for a strong and functional rack.

    Finishing Touches

    Once your rack is assembled, take the time to make it look its best! Use sandpaper to smooth out any rough edges, and consider applying a wood stain or paint for a custom finish. This will help protect the wood and add a touch of personality to your rack.

    Enjoy Your New Firewood Rack

    Congratulations, you've created a sturdy and functional firewood rack using recycled pallets! Place your rack in a convenient location near your fireplace or fire pit. You'll appreciate the organization and ease of access it provides. Now, you're ready to enjoy the warm glow of your fireplace, knowing you built a beautiful and eco-friendly rack yourself.

    Share:

    Building a Bedside Cabinet with Sustainable Materials

    Building a Bedside Cabinet with Sustainable Materials

    Crafting a Sustainable Bedside Cabinet: A DIY Guide to Eco-Friendly Furnishings

    Hey there, fellow eco-conscious crafters! Are you looking to add a touch of personal style to your bedroom while being mindful of the planet? Building a bedside cabinet from sustainable materials is a fantastic way to achieve both. It's not just about using eco-friendly wood, it's about embracing a mindful approach to every step of the process.

    Let's embark on this journey together, diving into the world of sustainable materials, exploring design possibilities, and getting our hands dirty (in a good way, of course!)

    Choosing Sustainable Materials: A Foundation for Eco-Friendly Furnishings

    The heart of a sustainable bedside cabinet lies in its materials. We're not just talking about avoiding harmful chemicals and deforestation, but also embracing materials with longevity and beauty. Here's a look at some fantastic options:

    Reclaimed Wood: A Second Chance at Life

    Reclaimed wood is a superstar in the sustainable building world. It's a material with stories to tell, each piece holding a unique history. Think salvaged barn wood, repurposed pallets, or even old doors. These materials offer a rich texture and character that adds a touch of rustic charm.

  • Reduced Environmental Impact: Using reclaimed wood means less demand for new timber, minimizing deforestation and its associated environmental harm.
  • Unique Character: Every piece of reclaimed wood is one-of-a-kind, with its own knots, imperfections, and history, creating a truly unique piece of furniture.
  • Sustainable Source: By reusing salvaged wood, you're actively contributing to a circular economy, giving materials a new purpose instead of letting them end up in landfills.
  • Bamboo: A Fast-Growing Wonder

    Bamboo is a fantastic alternative to traditional hardwoods. It grows quickly and can be harvested sustainably, making it an excellent choice for environmentally conscious furniture.

  • Rapid Regeneration: Bamboo matures much faster than hardwoods, reducing the need for extensive harvesting cycles and minimizing the impact on forests.
  • Strength and Durability: Bamboo is surprisingly strong and resistant to damage, making it a suitable material for furniture that will last for years.
  • Versatility: Bamboo can be easily shaped and worked with, allowing for a range of design possibilities.
  • Recycled Plastics: Giving Waste a New Purpose

    This might surprise you, but recycled plastic can actually be a strong and sustainable option for certain furniture elements. It's particularly useful for drawer fronts or the cabinet's frame.

  • Reducing Landfill Waste: Using recycled plastic reduces the amount of waste that ends up in landfills, lessening the strain on our planet's resources.
  • Durable and Low-Maintenance: Recycled plastic is often more durable and requires less maintenance than traditional wood, offering a practical choice for furniture.
  • Creative Designs: Recycled plastic can be molded and shaped into unique and innovative designs, adding a modern twist to your bedside cabinet.
  • Designing Your Sustainable Cabinet: A Blend of Style and Sustainability

    Now that we've chosen our sustainable materials, let's dive into the fun part - design! Think about the style that suits your bedroom, whether it's rustic charm, minimalist elegance, or a touch of modern flair.

    Simple and Functional: A Minimalist Approach

    If you're looking for a clean and streamlined look, a simple bedside cabinet with open shelves and a drawer might be perfect. The minimalist aesthetic embraces functionality, focusing on simplicity and practicality.

  • Open Shelves: Great for displaying books, plants, or decorative items.
  • Single Drawer: Provides storage for essentials like pajamas, books, or your phone charger.
  • Clean Lines and Simple Hardware: Emphasizes the clean lines of the design and avoids unnecessary embellishments.
  • Rustic Charm: Reclaiming History

    Reclaimed wood is the star of the show when it comes to a rustic look. Embrace the natural imperfections of the wood, creating a unique and cozy feel.

  • Uneven Surfaces: Embrace the knots and cracks in the reclaimed wood for a truly authentic rustic look.
  • Open Shelves with Brackets: Showcase the beauty of the wood while offering plenty of storage space.
  • Distressed Finish: Apply a light sanding or stain to highlight the natural texture of the reclaimed wood.
  • Modern and Minimal: A Touch of Contemporary Style

    For a modern aesthetic, think sleek lines, geometric shapes, and a touch of minimalist elegance. Recycled plastic or bamboo can create a fresh and contemporary feel.

  • Geometric Shapes: Incorporate simple geometric shapes into the cabinet's structure for a modern edge.
  • Flush Drawer Fronts: Create a clean and streamlined look with flush drawer fronts that blend seamlessly into the cabinet.
  • Metal Hardware: Add a touch of industrial flair with metal handles and hinges.
  • Building Your Bedside Cabinet: A Practical Guide to Sustainable Craftsmanship

    Now it's time to roll up our sleeves and get to work! Remember, this is a DIY project, so don't be afraid to experiment and make it your own. Here's a basic framework for building your bedside cabinet:

    Step 1: Gathering Your Materials and Tools

  • Sustainable Wood: Reclaimed wood, bamboo, or recycled plastic.
  • Woodworking Tools: Saw, drill, screwdriver, sandpaper, measuring tape, level, clamps.
  • Hardware: Hinges, drawer slides, knobs, handles.
  • Finish: Wood stain, sealant, or paint (choose eco-friendly options).
  • Step 2: Creating the Base and Frame

  • Measure and Cut: Determine the dimensions of your cabinet and cut the wood for the base and frame.
  • Assembling the Frame: Use wood glue and screws to secure the frame pieces.
  • Attaching the Base: Attach the base to the frame, ensuring it's level and secure.
  • Step 3: Building the Shelves and Drawer

  • Shelf Construction: Cut and assemble shelves according to the dimensions of your cabinet.
  • Drawer Assembly: Build the drawer box and attach the drawer slides.
  • Installing Shelves and Drawer: Securely attach the shelves and drawer to the cabinet frame.
  • Step 4: Finishing Touches and Refinement

  • Sanding: Sand all surfaces smooth for a professional finish.
  • Finishing: Apply stain, sealant, or paint according to your chosen aesthetic.
  • Hardware Installation: Attach hinges, drawer slides, knobs, and handles.
  • Embracing Sustainability Beyond the Cabinet

    Creating a sustainable bedside cabinet is just the beginning! Consider these additional tips to enhance your eco-conscious journey:

  • Upcycle and Reuse: Give old furniture a makeover instead of buying new.
  • Shop Local and Support Sustainable Brands: Choose materials and products from companies committed to ethical sourcing and production.
  • Reduce Waste: Minimize waste during construction by planning carefully and repurposing scrap wood.
  • Choose Eco-Friendly Finishes: Opt for water-based paints and stains that are less toxic and have a lower environmental impact.
  • Building a sustainable bedside cabinet is a rewarding journey. It's about creating a piece of furniture that reflects your values and contributes to a more sustainable future. Happy crafting, and remember, every step you take towards eco-friendly living makes a difference!

    Share:

    Budget Cold Frame Plans for Thriving Plants

    Budget Cold Frame Plans for Thriving Plants

    Budget Cold Frame Plans for Thriving Plants

    Extend your gardening season and nurture delicate seedlings with a budget-friendly cold frame. This simple structure provides a protective haven for your plants, shielding them from harsh weather and promoting faster growth. This article guides you through building a cold frame using readily available materials and basic tools, ensuring a successful growing experience.

    Choosing the Right Materials

    The beauty of a cold frame lies in its simplicity. You don't need expensive materials to achieve effective results. Consider these options:

    Frame

    • Recycled Window Frames: Scour local salvage yards or ask neighbors for discarded window frames. These offer excellent insulation and natural light transmission.
    • Wood Pallets: Disassemble a pallet, and use its sturdy planks to create a rectangular frame. Securely attach the planks using screws or nails.
    • PVC Pipes: Cut and assemble PVC pipes to form the frame, creating a durable and lightweight structure.

    Cover

    • Clear Plastic Sheeting: This affordable option provides excellent light transmission and can be easily replaced if damaged.
    • Glass Panels: For a more durable and aesthetically pleasing option, use salvaged glass panes or old storm windows. Secure them with weather-resistant tape or sealant.
    • Polycarbonate Sheets: Consider using polycarbonate sheets for exceptional durability and UV protection. They offer better insulation than plastic sheeting.

    Construction Steps

    Once you've gathered your materials, it's time to build your cold frame. Follow these easy steps:

    Step 1: Assemble the Frame

    If using wood pallets, carefully disassemble them, removing nails or staples. Use screws to assemble a rectangular frame. For window frames, ensure they are free of broken glass or sharp edges. For PVC pipes, use connectors and glue to assemble a secure frame. If necessary, reinforce the frame with additional supports for stability.

    Step 2: Prepare the Base

    Choose a sunny location for your cold frame. Clear the area of debris and weeds. Create a level base using a layer of gravel or bricks to ensure good drainage. You can also consider adding a layer of landscape fabric or weed barrier to prevent unwanted growth.

    Step 3: Attach the Cover

    Secure the chosen cover material to the frame. For plastic sheeting, use staples or clips. For glass panels, use weather-resistant tape or sealant. For polycarbonate sheets, use screws or clips. Ensure the cover is snug and weatherproof.

    Step 4: Add Ventilation

    To prevent overheating, create a ventilation system. For plastic sheeting, cut a flap at the top and secure it with Velcro or hinges. For glass panels, use a small window or sliding panel for ventilation. Ensure adequate airflow within the cold frame.

    Planting and Maintenance

    Now that your cold frame is ready, let's fill it with life:

    Plant Selection

    Choose plants that thrive in cooler temperatures, such as lettuce, spinach, kale, carrots, and herbs. Start seeds indoors or purchase seedlings from a garden center. Gently transplant them into the cold frame, spacing them appropriately.

    Watering and Monitoring

    Water your plants regularly, ensuring the soil is consistently moist but not soggy. Monitor the temperature inside the cold frame, adjusting the ventilation as needed. During cold nights, consider covering the cold frame with an extra layer of insulation, such as a blanket or old tarp.

    Troubleshooting

    Be vigilant for signs of pests or diseases. If you notice any problems, address them promptly. Clean the cold frame regularly to prevent the build-up of debris and promote healthy growth.

    Enjoy the Rewards

    With minimal effort and cost, you can have a productive cold frame. Enjoy fresh, homegrown produce throughout the year. Witness the joy of watching your plants thrive in their protected haven, thanks to your ingenuity and dedication.

    Share:

    Winter-Proof Your Garden with a Cold Frame

    Winter-Proof Your Garden with a Cold Frame

    Winter-Proof Your Garden with a Cold Frame: A Guide to Extending Your Growing Season

    So, the frost is nipping at your heels, and you’re looking at your beloved garden with a sigh. It’s time to bid farewell to summer blooms and vibrant vegetables, right? Not so fast! Enter the cold frame, your secret weapon to stretching out the growing season and keeping your garden alive and kicking even when the temperatures plummet.

    A cold frame, in its simplest form, is a mini-greenhouse that harnesses the sun’s warmth to create a microclimate that’s perfect for tender plants to thrive through the colder months. Think of it as a cozy winter sanctuary for your garden babies, protecting them from frost, snow, and harsh winds.

    Why You Need a Cold Frame

    If you’re a gardener, you know the thrill of seeing your plants flourish, and a cold frame lets you experience that joy even in the depths of winter. But that’s not all! Here are some reasons why a cold frame is your garden’s best friend:

    Extend Your Growing Season

    Start seeds earlier in the spring, or keep your tender plants growing longer into the fall and winter. A cold frame gives your plants a head start on the season and allows them to continue growing even when the outdoor temperatures are frigid. Imagine fresh herbs and salad greens even in December!

    Harden Off Seedlings

    Before you transplant your seedlings outdoors, give them a chance to acclimate to the elements. The cold frame provides a safe, gradual transition, preventing shock and ensuring they’re strong enough to face the real world.

    Overwinter Plants

    Many plants, like roses, perennials, and even some vegetables, can be successfully overwintered in a cold frame. It’s like giving them a mini-vacation, ensuring they emerge healthy and ready to bloom in the spring.

    Protect from Pests and Diseases

    A cold frame acts as a barrier, keeping out pesky insects and diseases that can wreak havoc on your plants, especially during the colder months. It's a safe haven for your garden treasures!

    Building Your Own Cold Frame: It's Easier Than You Think!

    You don't need to be a master carpenter to create a cold frame. You can choose from a variety of materials, depending on your budget and DIY skills. Here's a rundown of some popular options:

    DIY Cold Frame: Getting Creative with Materials

    There’s a certain satisfaction in building your own cold frame. The world is your oyster when it comes to materials, so let’s get creative!

    • Recycled Windows or Doors: Repurpose old windows or doors for a charming and budget-friendly cold frame. Just make sure they’re sturdy and weather-resistant.
    • Wood: A classic choice for cold frames. Use untreated lumber or cedar for durability and longevity. You can build a basic box frame or a more elaborate design with shelves for different plants.
    • PVC Pipe: If you’re looking for a lightweight and easily assembled option, PVC pipe is a great material. It’s readily available and easy to work with. You can even create a curved, arching cold frame for a unique look.
    • Brick or Stone: If you want something more permanent, consider using bricks or stones to build your cold frame. They provide excellent insulation and create a beautiful, rustic look.

    Pre-Made Cold Frames: When Convenience is King

    If you want to save time and effort, there are plenty of ready-made cold frames available in a range of sizes and materials. You can find them at garden centers, online retailers, and even big box stores. These pre-made cold frames are often made of durable materials like polycarbonate or fiberglass, and they come with all the necessary hardware for easy assembly.

    Setting Up Your Cold Frame for Success

    Once you have your cold frame built, it’s time to give it a home in your garden. Here’s what you need to do:

    Location, Location, Location!

    Choose a sunny spot for your cold frame. It should get at least six hours of direct sunlight each day, especially during the winter months. Ideally, place it facing south for maximum sun exposure.

    The Perfect Soil Mix

    Fill the cold frame with a well-draining potting mix. You can use a pre-made potting mix or create your own by combining compost, peat moss, and perlite. Make sure the soil is loose and airy to allow for good drainage.

    Ventilation is Key

    A cold frame needs ventilation to regulate temperature and prevent moisture buildup. Install vents or windows on the lid for easy access to the interior. Open the vents on warm days to allow for airflow and close them at night or on cold days to trap heat.

    Protecting from the Elements

    Cover the cold frame with a clear, durable plastic sheeting or polycarbonate panels. This will create a mini-greenhouse effect, trapping heat and allowing sunlight to penetrate. You can use weights or clamps to secure the lid and prevent it from blowing away.

    Cold Frame Gardening: A Step-by-Step Guide

    Now you're ready to start growing! Here’s how to make the most of your cold frame:

    Planting Time!

    You can sow seeds directly into the cold frame or transplant seedlings that you’ve started indoors. Make sure to space the plants according to their specific needs.

    Watering is Crucial

    Monitor the moisture levels in your cold frame regularly and water when the soil feels dry to the touch. Don’t overwater, as this can lead to root rot.

    A Little Sunshine Goes a Long Way

    Make sure your plants are receiving enough sunlight. If they are not getting enough light, they may become leggy and weak. You may need to adjust the position of your cold frame during the winter months to maximize sun exposure.

    Temperatures Matter!

    Monitor the temperatures inside the cold frame, especially during cold snaps. You can use a simple thermometer to check the temperature. If it drops below freezing, you may need to cover the cold frame with an additional layer of insulation, like blankets or bubble wrap.

    Harvesting Your Bounty

    As your plants mature, enjoy the fruits (or veggies!) of your labor! Harvest your produce regularly to encourage further growth.

    The Cold Frame: A Gift That Keeps on Giving

    A cold frame is a simple, yet effective way to extend your growing season and enjoy fresh produce year-round. It’s a true testament to the power of ingenuity and resourcefulness. So, if you're looking for a way to bring a touch of spring to your winter garden, consider building a cold frame. It's an investment that will bring you joy for years to come!
    Share:

    How to Assemble a Squirrel Den Box with Ease

    How to Assemble a Squirrel Den Box with Ease

    How to Assemble a Squirrel Den Box with Ease

    Squirrel den boxes, also known as squirrel houses, provide a safe and cozy haven for these furry creatures, especially during the harsh winter months. Building your own squirrel den box can be a rewarding experience, allowing you to get creative and provide a welcoming home for your local squirrel population. This detailed guide will walk you through the steps of assembling a squirrel den box with ease, equipping you with the knowledge and confidence to build a sturdy and inviting shelter for your neighborhood squirrels.

    Gather Your Materials

    Before embarking on your construction journey, ensure you have all the necessary materials readily available. A well-equipped toolbox will make the assembly process smooth and efficient.

    Wood

    The foundation of your squirrel den box is the wood. Opt for durable, weather-resistant wood, such as cedar, redwood, or pressure-treated pine. Avoid using plywood, as it can deteriorate quickly and become unsafe for the squirrels. You will need:

    • Four pieces of wood for the sides, measuring 12 inches by 12 inches
    • Two pieces of wood for the top and bottom, measuring 12 inches by 12 inches
    • One piece of wood for the front, measuring 12 inches by 6 inches
    • One piece of wood for the back, measuring 12 inches by 6 inches

    Hardware

    To hold your squirrel den box together, you will need:

    • 16 wood screws, 2 inches long
    • 4 wood screws, 1 inch long
    • A drill with a bit that matches the size of your wood screws
    • A screwdriver
    • A measuring tape
    • A pencil
    • A saw (for cutting the wood if needed)
    • Sandpaper (for smoothing out any rough edges)

    Constructing the Box

    Assemble the Sides

    Begin by assembling the four side pieces of your squirrel den box. Using your drill, pre-drill pilot holes into each piece of wood to prevent the wood from splitting when screwing it together. Place two side pieces together, aligning the edges, and screw them together using four screws. Repeat this process for the remaining two side pieces. You will now have two identical side panels.

    Attach the Top and Bottom

    Next, attach the top and bottom pieces to the side panels. Place one of the side panels flat on a work surface. Align the bottom piece with the bottom edge of the side panel and screw it into place using four screws. Repeat this process for the top piece and the other side panel. You now have a box with a complete base and top.

    Attach the Front and Back

    Now, it’s time to add the front and back of your squirrel den box. Align the front piece with the open end of the box, making sure the bottom edge of the front piece is flush with the bottom of the box. Secure it in place using four screws. Repeat this process for the back piece. Your squirrel den box is taking shape!

    Creating the Entrance Hole

    To make the entrance hole, measure and mark a 3-inch diameter circle in the center of the front piece of your squirrel den box. Use a jigsaw or a drill with a hole saw to cut out the circle. You can create a slightly larger opening, up to 4 inches in diameter, for larger squirrels. Make sure the edges are smooth and free of any sharp points that could injure the squirrels.

    Finishing Touches

    Sanding and Sealing

    To ensure a smooth, durable finish, sand the entire surface of your squirrel den box, including the inside. This removes any rough edges or splinters that could potentially harm the squirrels. Apply a weather-resistant sealant to protect the wood from moisture and decay, prolonging the life of your squirrel den box. Use a water-based sealant to minimize harmful fumes for the squirrels.

    Installation and Placement

    Choosing the right location for your squirrel den box is crucial for the squirrels' safety and comfort. Install the box at least 10 feet above ground to prevent predators from accessing it. Secure the box to a sturdy tree trunk or a strong post using metal straps or wire. Position the entrance hole facing away from the prevailing wind and rain to provide the squirrels with maximum protection. Remember, the squirrel den box should be placed in a location with ample vegetation, providing the squirrels with access to food and shelter.

    Final Thoughts

    Congratulations! You’ve successfully assembled a squirrel den box that will provide a safe and comfortable haven for these delightful creatures. By following these detailed steps, you’ve created a welcoming home for squirrels in your area. You will not only be providing them with a place to shelter and raise their young but also contributing to the preservation of this vital part of our local ecosystem. As you enjoy watching the squirrels utilize your handcrafted squirrel den box, take pride in your contribution to their well-being and the beautiful balance of nature.

    Share:

    DIY Birdhouse: How to Design a House for Multiple Birds

    DIY Birdhouse: How to Design a House for Multiple Birds

    Designing a Birdhouse for Multiple Birds

    Attracting a variety of birds to your backyard can be a rewarding experience. Providing a birdhouse specifically designed for multiple species can create a lively and diverse ecosystem. This guide will walk you through the key considerations for designing a multi-species birdhouse.

    Understanding Birdhouse Preferences

    Before you start building, it's essential to understand the different preferences of various bird species. Birdhouses are more than just shelter; they are nesting sites, and each species has unique requirements for size, entrance hole diameter, and location.

    Bird Size and Entrance Hole

    The most crucial factor in multi-species birdhouse design is the entrance hole size. This determines which birds can access the house. Here's a general guide:

    • Small birds (Chickadees, Wrens, Titmice): 1-inch entrance hole
    • Medium-sized birds (Bluebirds, Nuthatches, Downy Woodpeckers): 1.25-1.5-inch entrance hole
    • Larger birds (House Sparrows, House Finches, Woodpeckers): 1.5-2-inch entrance hole

    Consider the birds common to your area and choose entrance hole sizes that accommodate the range of species you want to attract.

    Nesting Material Preference

    Birds have different preferences for nesting materials. Some prefer soft materials like grasses and feathers, while others utilize twigs and bark. Consider incorporating features that cater to various preferences:

    • Open compartments: Provide areas with easy access for birds to bring in nesting materials.
    • Pre-made nesting cups: Offer a pre-built platform for some species that prefer a starting point.
    • Variety of materials: Include small branches, twigs, and shredded bark for diverse nesting preferences.

    Designing a Multi-Species Birdhouse

    Here's a step-by-step guide to building a birdhouse for multiple species:

    Choosing Materials

    Select weather-resistant materials that can withstand the elements. Popular choices include:

    • Cedar: Durable, naturally rot-resistant, and attractive.
    • Pine: Affordable, lightweight, and easy to work with.
    • Redwood: Long-lasting, resistant to insects and decay.
    • Plywood: Strong, versatile, and available in various thicknesses.

    Avoid using treated lumber, as the chemicals can be harmful to birds.

    Building the Structure

    Constructing a multi-species birdhouse involves creating compartments with different entrance hole sizes. Here's a possible design:

    1. Base: Build a sturdy base for the birdhouse, ensuring stability.
    2. Main Compartment: Create a main compartment with a large entrance hole (1.5-2 inches) for larger birds.
    3. Smaller Compartments: Add one or two smaller compartments with 1-1.25-inch entrance holes for smaller birds.
    4. Roof: Construct a sloped roof to shed rain and snow.
    5. Ventilation: Include ventilation holes for air circulation to prevent moisture buildup.

    Make sure each compartment is deep enough to allow for nesting and provide some space for the birds to move around.

    Adding Features

    Incorporate features to enhance the birdhouse's appeal:

    • Perches: Include perches near the entrance holes for birds to rest.
    • Landing Platform: Add a platform under the entrance for easy access.
    • Removable Roof: Design a roof that can be easily removed for cleaning and maintenance.

    Placement and Maintenance

    Proper placement and ongoing maintenance are crucial for a successful birdhouse:

    Placement

    • Height: Position the birdhouse at a height of 5-10 feet above the ground.
    • Protection: Place the birdhouse in a sheltered area, away from direct sunlight and harsh winds.
    • Location: Choose a location with nearby sources of food and water.
    • Visibility: Place the birdhouse where you can easily observe the birds.

    Maintenance

    Regular maintenance is essential to keep the birdhouse clean and safe for birds:

    • Clean the birdhouse: Clean out the nesting material after each brood. Dispose of it properly to prevent the spread of diseases.
    • Repair damage: Check for cracks or damage to the structure. Repair any issues promptly.
    • Replace nesting material: If the nesting material deteriorates, replace it with fresh material.

    By following these design guidelines, you can create a welcoming habitat for a diverse array of birds, enhancing your backyard's natural beauty and biodiversity.

    Share:

    How to build a compact desk for dorm rooms with wood

    How to build a compact desk for dorm rooms with wood

    Building a Compact Desk for Dorm Rooms with Wood

    Living in a dorm room can be a challenge when you need to balance studying, socializing, and just having a place to relax. You might not have a lot of space, but don't worry! With a little bit of time and some basic woodworking skills, you can build a compact desk that's perfect for your dorm room. This project is designed to be simple and manageable, so even beginners can get this done. Let's get started!

    Materials You'll Need

    Before you start cutting wood, let's get everything organized. You'll need:

    • Wood boards (for the top, legs, and supports) - Look for sturdy, pre-cut boards at your local hardware store. Pine or plywood are good choices.
    • Wood glue
    • Wood screws (different lengths for various parts)
    • Screwdriver or drill
    • Measuring tape
    • Pencil
    • Saw (handsaw or circular saw)
    • Sandpaper (different grits)
    • Safety glasses
    • Optional: Wood stain or paint

    Step 1: Design Your Desk

    First, figure out how big your desk needs to be. This depends on how much space you have and what you'll use it for. You can draw a rough sketch of your desk design or use a simple online tool for that. Consider these things:

    • Desk top size - How much space do you need for a laptop, books, and other supplies?
    • Leg height - Make sure it's comfortable to sit at. A standard height is around 29 inches.
    • Style - Do you want a simple, rectangular desk or something a bit more intricate?
    • Extra features - Do you want a shelf, drawer, or any other additions?

    Step 2: Cut Your Wood

    Now it's time to get your hands dirty! Using your design as a guide, cut your wood into the desired lengths and shapes.

    Safety First! Always wear safety glasses when cutting wood. Make sure the area you're working in is clean and free of clutter. Take your time and be careful!

    Here's what to cut:

    • Desk top - Cut a rectangular piece of wood to your desired size.
    • Legs - Cut four pieces of wood to your desired leg height. If you want a more sturdy desk, you could use 2x2 boards, and if you need a lighter desk, you can use 1x2 boards for the legs.
    • Supports - These pieces will connect the legs to the desk top. They should be cut to the width of your desk top and slightly shorter than the legs. You'll want to use at least 2 supports on each side for stability.

    Step 3: Assembling the Desk

    Now comes the fun part! Assemble your desk pieces, making sure everything is aligned and secure.

    • Attach the supports to the legs - Use wood glue and screws to secure the supports to the legs.
    • Attach the legs to the desk top - Position the supports and legs so that they are evenly spaced on the underside of the desk top. Secure them using wood glue and screws.

    Step 4: Sanding and Finishing

    Sanding smooths out any rough edges and helps prepare your desk for finishing. Use progressively finer grits of sandpaper, starting with a rougher grit to remove any saw marks and then using a finer grit to give it a smoother finish.

    Now it's time to give your desk some character. You can stain, paint, or varnish it to match your dorm room decor. If you want a natural look, you could apply a clear sealant.

    Extra Tips for Dorm Room Desk Success

    Here are some extra tips to make your compact dorm room desk even better:

    • Add a shelf - A shelf below the desk top can provide extra storage space for books or other items. It's easy to add! Just cut a piece of wood to the width of your desk top and attach it to the supports with wood glue and screws.
    • Think about cable management - Ditch the tangled mess of cords! You can add a channel or grommet to the desk top to help manage wires.
    • Get creative with storage - Use bins, baskets, or drawers to keep your desk tidy and organized.
    • Accessorize - Add a desk lamp, a plant, or some decorative items to personalize your space.

    Enjoy Your New Desk!

    Building your own compact desk is a great way to create a functional and personalized workspace in your dorm room. You'll have a sense of pride knowing you built it yourself, and it will be a perfect place to study, relax, and work on your projects. Good luck!

    Share:

    Add a touch of magic: build a wooden magic box

    Add a touch of magic: build a wooden magic box

    Crafting a Wooden Magic Box: A Guide to Enchanting Wood

    Ever dreamt of owning a magic box, a treasure chest brimming with mystical possibilities? Maybe you picture it nestled on a dusty shelf, its intricate carvings whispering secrets of forgotten lore. Or perhaps you envision it at the center of a dramatic spell, its lid flying open to reveal a swirling vortex of shimmering light. Well, my friend, you're not alone. The allure of the magic box is a timeless one, a yearning to unlock the hidden wonders of the world.

    Today, we embark on a journey of creation, transforming humble wood into a vessel of magic. We'll delve into the heart of woodworking, exploring techniques that enhance the mystical aura of our box. From the selection of the perfect timber to the final embellishments, we'll embrace the artistry of woodworking and infuse it with the spark of enchantment.

    Choosing the Wood: Embracing the Spirit of the Tree

    The first step is choosing the wood. Imagine this â€" you're standing before a towering oak, its bark rough and weathered, yet its heartwood warm and inviting. This is the essence of wood selection; you're not just choosing material, you're selecting a partner in your magic.

    Here's what to consider:

    • Hardwoods vs. Softwoods: Hardwoods like oak, walnut, and cherry lend themselves to intricate details and durability. They're strong, resistant to scratches and wear, perfect for a box that's meant to hold the weight of magic. Softwoods like pine and cedar have a softer grain, making them ideal for carving and creating intricate designs, especially if you're drawn to a more rustic, earthy feel.
    • Color and Grain: The color and grain of wood are part of its inherent beauty. Imagine the deep, rich hues of mahogany, the captivating swirls of maple, or the warm, golden tones of pine. Each wood has a distinct character, reflecting the tree's journey through the seasons.
    • Energy and Symbolism: Oak is often associated with strength and wisdom, while cherry symbolizes love and good fortune. Pine evokes tranquility and resilience, while cedar is known for its protective and cleansing properties. Choose the wood that resonates with the type of magic you wish to embody in your box.

    Ultimately, let your intuition guide you. Pick up the wood, feel its texture, and allow its energy to speak to you. The right wood will beckon you, whispering promises of magical possibilities.

    Building the Box: Constructing a Sanctuary of Magic

    Now that you have your chosen wood, it's time to bring your vision to life. Whether you prefer classic joinery techniques or embrace modern methods, the key is to infuse each step with a mindful intention. This isn't simply building a box; you're crafting a sacred space to hold your magic.

    Cutting and Shaping: Shaping the Essence of the Box

    Start by cutting your wood into the desired dimensions. This is where precision is key. Use a sharp saw, making sure your cuts are clean and straight. If you're feeling adventurous, try shaping the edges of your box with a chisel or rasp to create a more tactile and unique feel.

    Joining the Panels: A Dance of Strength and Grace

    Joining the panels of your box is a vital step. For a sturdy box, consider traditional joinery techniques like mortise and tenon, dovetail, or mitered corners. These methods create strong, interlocking joints that enhance the box's durability. If you're new to joinery, you can also opt for simpler methods like butt joints, using glue and screws for added security.

    Adding Intricate Details: Enchanting the Wood with Carving and Inlays

    Now comes the fun part â€" adding details that transform your box into something truly magical. Carving is a beautiful way to bring your box to life. Use sharp tools to create intricate patterns, symbolic motifs, or even small, hidden compartments.

    Inlay work adds another dimension of magic. Here, you're incorporating other materials into the surface of the wood, creating a mesmerizing interplay of textures and colors. Imagine a swirling pattern of mother-of-pearl, a constellation of shimmering gemstones, or a touch of intricate metalwork. Let your imagination run wild!

    Finishing Touches: Sealing the Magic Within

    The final step is to seal the magic within your box. This is where your box truly comes alive, its beauty enhanced and its mystical aura strengthened.

    • Sanding: Begin by sanding your box meticulously. Sanding smooths the wood, revealing its natural beauty and creating a uniform surface for your finish.
    • Finishing: Choose a finish that complements the wood and the overall magic of your box. Oil finishes like linseed oil or tung oil bring out the wood's natural grain, while varnishes add a protective layer and create a smooth, glossy finish. For a more rustic look, consider a wax finish.
    • Embellishments: Once the finish is applied, you can add the finishing touches that truly make your box unique. Consider adding a beautiful lock and key, a hand-painted inscription, or a touch of glitter to enhance the mystical vibe.

    As you complete your magic box, remember that it's not just a container; it's a vessel of your own intentions and creativity. Fill it with cherished objects, herbs, crystals, or whatever speaks to your magical heart. Each item you place inside will infuse the box with its own energy, making it a potent symbol of your personal magic.

    And as you hold the box in your hands, let your imagination soar. Imagine the stories it could hold, the spells it could conjure, the secrets it could whisper. Your magic box is more than just a piece of wood; it's a testament to your power, a reflection of your dreams, and a vessel of boundless possibilities. Go forth, my friend, and create your own enchantment!

    Share:

    Classic and Modern Bedside Cabinet Plans to Try

    Classic and Modern Bedside Cabinet Plans to Try

    Classic and Modern Bedside Cabinet Plans to Try

    A bedside cabinet is a functional and stylish addition to any bedroom. It provides a convenient spot for a lamp, a book, and other essentials. With a little creativity, you can build your own bedside cabinets from scratch. This article will cover both classic and modern styles, empowering you to build the perfect complement to your bedroom decor.

    Classic Bedside Cabinet Plans

    Classic bedside cabinets are known for their timeless elegance and simplicity. Here are some plans that you can use to build your own:

    The Shaker Style

    Shaker bedside cabinets are characterized by their clean lines, simple construction, and functional design. You can build a Shaker bedside cabinet using plywood, hardwood, or a combination of both. The key to a successful Shaker design is to use simple joinery techniques and to avoid excessive ornamentation.

    Here’s what you’ll need to get started:

    • Wood (plywood or hardwood)
    • Screws
    • Wood glue
    • Finishing nails
    • Sandpaper
    • Wood stain or paint
    • Hardware (knobs or pulls)

    To build a Shaker bedside cabinet, follow these steps:

    1. Cut all of the pieces to size.
    2. Assemble the cabinet frame using screws and wood glue.
    3. Attach the cabinet sides, back, and shelf.
    4. Sand all of the surfaces smooth.
    5. Apply wood stain or paint.
    6. Install the hardware.

    The Mission Style

    Mission-style furniture features sturdy construction, natural wood finishes, and simple, geometric designs. Mission bedside cabinets often have square or rectangular shapes, with minimal ornamentation. To build a Mission bedside cabinet, you can use solid wood like oak, cherry, or walnut.

    Here’s what you’ll need to get started:

    • Solid wood (oak, cherry, or walnut)
    • Screws
    • Wood glue
    • Finishing nails
    • Sandpaper
    • Wood stain or paint
    • Hardware (knobs or pulls)

    To build a Mission bedside cabinet, follow these steps:

    1. Cut all of the pieces to size.
    2. Assemble the cabinet frame using screws and wood glue.
    3. Attach the cabinet sides, back, and shelf.
    4. Sand all of the surfaces smooth.
    5. Apply wood stain or paint.
    6. Install the hardware.

    Modern Bedside Cabinet Plans

    Modern bedside cabinets offer a sleek and contemporary look. These designs often emphasize clean lines, geometric shapes, and minimalist aesthetics. Here are some plans to get you started:

    The Mid-Century Modern Style

    Mid-century modern bedside cabinets are characterized by their simple shapes, tapered legs, and use of natural materials. Popular choices include walnut, rosewood, and teak. The design often features a combination of wood and metal, creating a unique visual contrast.

    Here’s what you’ll need to get started:

    • Wood (walnut, rosewood, or teak)
    • Metal (for legs, handles, etc.)
    • Screws
    • Wood glue
    • Finishing nails
    • Sandpaper
    • Wood stain or paint
    • Hardware (knobs or pulls)

    To build a Mid-Century Modern bedside cabinet, follow these steps:

    1. Cut all of the pieces to size.
    2. Assemble the cabinet frame using screws and wood glue.
    3. Attach the cabinet sides, back, and shelf.
    4. Sand all of the surfaces smooth.
    5. Apply wood stain or paint.
    6. Install the hardware.

    The Minimalist Style

    Minimalist bedside cabinets prioritize functionality and clean lines. The focus is on simplicity and a lack of ornamentation. These cabinets often feature a single drawer or shelf, offering a sleek and streamlined look. The choice of materials is usually limited to a few, with a focus on natural wood, metal, or glass.

    Here’s what you’ll need to get started:

    • Wood (plywood or hardwood)
    • Metal (for legs, handles, etc.)
    • Screws
    • Wood glue
    • Finishing nails
    • Sandpaper
    • Wood stain or paint
    • Hardware (knobs or pulls)

    To build a Minimalist bedside cabinet, follow these steps:

    1. Cut all of the pieces to size.
    2. Assemble the cabinet frame using screws and wood glue.
    3. Attach the cabinet sides, back, and shelf.
    4. Sand all of the surfaces smooth.
    5. Apply wood stain or paint.
    6. Install the hardware.

    No matter what style you choose, building your own bedside cabinet is a rewarding project. It’s a great way to express your creativity, add a unique touch to your bedroom, and save money. So, pick a plan, gather your tools, and get started! Happy building!

    Share:

    Magic box woodworking: the beginner's guide

    Magic box woodworking: the beginner's guide

    Magic Box Woodworking: The Beginner's Guide

    Welcome to the world of woodworking! This beginner's guide will equip you with the knowledge and skills to craft your very own magic box. Get ready to unlock a world of creativity and satisfaction as you transform simple wood into a captivating treasure chest. Let's get started!

    Choosing Your Materials

    Selecting the right materials is crucial for a successful project. For your first magic box, you'll need a few basic supplies:

    Wood

    Opt for a softwood like pine or fir. These woods are easy to work with and forgiving for beginners. You can find pre-cut boards or purchase a sheet of plywood and cut your own pieces.

    Tools

    You'll need a few essential tools to get started:

    • Saw: A hand saw or a jigsaw will do the trick. You can also consider using a miter saw for more precise cuts.
    • Drill: Choose a cordless drill for convenience. It's best to have a set of drill bits of various sizes for different tasks.
    • Sandpaper: You'll need different grit levels for smoothing the wood. Start with coarse grit and progress to finer grits for a polished finish.
    • Measuring Tape: This is indispensable for accurate measurements.
    • Pencil: Used for marking cutting lines and design elements.
    • Clamps: Essential for holding pieces together while gluing or securing them during construction.
    • Wood Glue: Choose a high-quality wood glue that is designed for woodworking projects.

    Designing Your Magic Box

    Now comes the fun part! Let your imagination soar as you design your magic box. Consider these key aspects:

    Shape

    Start with a simple rectangular or square box. You can add curves or unique features later on as your skills develop.

    Size

    Determine the desired size of your box based on its intended use. A small box is ideal for storing trinkets or small items, while a larger box can serve as a decorative centerpiece or a secret hiding place.

    Details

    Get creative with your design! Add decorative elements like hinges, latches, handles, or even a hidden compartment. Let your personality shine through.

    Constructing the Box

    Now, let's put your design into action:

    Cutting the Pieces

    Using your chosen saw, carefully cut the wood according to your design plans. Ensure all cuts are accurate and precise for a perfect fit.

    Assembling the Box

    Apply wood glue to the edges of your box pieces and carefully assemble them. Use clamps to secure the pieces together until the glue dries completely.

    Adding Details

    Once the box is assembled, it's time to add those decorative elements! Attach hinges, latches, handles, or any other details you've planned.

    Finishing Touches

    Give your magic box a professional finish:

    Sanding

    Carefully sand the box with sandpaper to smooth out any rough edges or imperfections. Start with coarser grits and progress to finer grits for a smooth, polished surface.

    Finishing

    Apply a clear finish, such as polyurethane or varnish, to protect the wood and enhance its beauty. Apply multiple coats for a durable finish.

    Beyond the Basics

    As you gain experience, experiment with different woods, techniques, and designs. Explore decorative inlays, carving, or painting to add a unique touch to your boxes. The possibilities are endless!

    Tips for Success

    Here are a few tips to help you along the way:

    • Measure Twice, Cut Once: Accuracy is key in woodworking. Always double-check your measurements before cutting.
    • Practice Makes Perfect: Start with simple projects and gradually work your way up to more complex designs.
    • Safety First: Always wear safety glasses and gloves when working with woodworking tools.
    • Clean Up: Keep your workspace tidy and organized for a safer and more efficient experience.
    • Have Fun! Enjoy the process of creating your own magic box. Let your creativity flow and don't be afraid to experiment.

    Congratulations! You've now mastered the fundamentals of woodworking. Remember, your journey as a woodworker is just beginning. With practice and dedication, you'll create beautiful and unique magic boxes that will amaze you and others. Keep crafting and keep creating!

    Share:

    How to make a wooden gun cabinet with safe compartments for guns

    How to make a wooden gun cabinet with safe compartments for guns

    Building a Wooden Gun Cabinet with Safe Compartments

    Hey there, gun owners! Let's talk about keeping your firearms secure and looking good while doing it. A wooden gun cabinet is the perfect way to store your collection, ensuring safety and adding a touch of class to your space. But we're not just talking about any old cabinet, we're diving into the world of building a cabinet with built-in safe compartments! So, grab your tools, put on your safety glasses, and let's get started.

    Planning Your Gun Cabinet

    Before you start hammering and sawing, it's essential to plan out your project. Here's what you need to consider:

    Size and Dimensions

    First things first, how much stuff do you need to store? Measure your collection, including rifles, handguns, and any accessories. Determine the ideal height, width, and depth for your cabinet to comfortably house everything. Don't forget to factor in the thickness of the wood and any additional space you'll need for the safe compartments.

    Safe Compartments: Deciding the Design

    Safe compartments are where things get exciting. Think about what you want to secure: Just your handguns? Maybe a few valuable accessories? Or, are you aiming for a full-blown safe within the cabinet? Here are some ideas:

    • Small, Lockable Drawers: Perfect for handguns, magazines, or ammo. You can install multiple drawers for easy organization.
    • Secure Compartments Within the Cabinet: This could be a smaller safe built into the cabinet itself, providing additional protection for your most valuable items.
    • Full-Size Safe Inside: For ultimate security, you can install a safe that occupies a significant portion of the cabinet. Just be sure to factor in the weight and ensure your cabinet can handle it.

    Wood Selection

    Choose sturdy wood that can handle the weight and potential impact. Here are some popular choices:

    • Oak: Durable, classic look, and easy to work with.
    • Maple: Strong, beautiful grain pattern, but a bit harder to work with.
    • Walnut: Gorgeous dark wood, very strong, but more expensive.
    • Pine: A good budget option, but not as strong as harder woods.

    Hardware and Tools

    You'll need a variety of tools and hardware to make this happen. Here's a basic list:

    • Table Saw: Cutting wood to size.
    • Router: For precise edges and creating decorative elements.
    • Drill: For making holes and attaching hardware.
    • Sandpaper: For smoothing surfaces and creating a fine finish.
    • Wood Glue: For joining wood pieces securely.
    • Screws and Nails: For construction and securing hardware.
    • Hinges: For the cabinet doors.
    • Locks: For securing the doors and safe compartments.
    • Finish: Stain, paint, or varnish to protect the wood and give it a desired look.

    Building the Cabinet

    Okay, time to put your planning into action! Let's build this cabinet step-by-step.

    Constructing the Cabinet Frame

    Start with the base of your cabinet. Cut four pieces of wood to the desired dimensions for the bottom and sides. Use glue and screws to join them, ensuring they are perfectly square and level. Next, attach the top frame to the bottom frame, creating a sturdy box. Remember to leave space for the safe compartments!

    Building the Safe Compartments

    Now for the fun part: Designing and building your safe compartments!

    • For drawers: Cut wood to the desired dimensions for the drawer sides, front, back, and bottom. Use glue and screws to assemble the drawers. Install drawer slides for smooth operation. Remember to leave space for the lock mechanism.
    • For secure compartments: You can create these using thicker wood or even metal sheets for extra security. Cut the pieces to size, use glue and screws to assemble them, and attach them inside the cabinet. Make sure the compartment is securely attached to the cabinet frame.
    • For full-size safe: This requires more precision. Measure the safe's dimensions and cut wood pieces accordingly. Attach them to the cabinet frame to create a custom-fitted housing for the safe. Be mindful of the weight and secure the safe properly.

    Adding the Doors

    After you've assembled the safe compartments, it's time for the doors. Cut your door pieces to the desired size, keeping in mind the thickness of the hinges. Cut grooves for the hinges using a router, and attach the hinges to the doors and the cabinet frame. Install the locks on the doors and make sure they operate smoothly.

    Finishing Touches

    Your cabinet is almost done! Now it's time to make it look great. Here's how to finish it off:

    Sanding and Finishing

    Sand all the surfaces of the cabinet, starting with coarse sandpaper and moving to finer grades to achieve a smooth finish. Apply stain, paint, or varnish as desired. Be sure to let the finish dry completely before handling.

    Adding Hardware and Accessories

    This is where you can get creative! Add decorative hardware like handles, knobs, and accents that match your style. You can even add a shelf inside the cabinet for storing accessories or cleaning supplies.

    Safety and Security Considerations

    Remember, this is a gun cabinet, so safety and security are paramount. Here are some important tips to keep in mind:

    • Strong Locks: Invest in quality locks that are difficult to pick or break. Consider multiple locking points for added security.
    • Secure Mounting: Mount your cabinet to the wall or floor using heavy-duty anchors to prevent theft or tipping.
    • Fireproofing: Consider adding fireproofing materials to protect your firearms and valuables in case of a fire.
    • Storage Tips: Always store your guns unloaded and with trigger locks engaged. Store ammunition separately to avoid accidents. Keep your cabinet locked and secure when not in use.

    Building a wooden gun cabinet with safe compartments is a challenging but rewarding project. With careful planning and attention to detail, you can create a beautiful and secure home for your valuable firearms. Remember, safety and security should always be your top priorities. Have fun building and enjoy your new gun cabinet!

    Share:

    Popular Posts

    Blog Archive

    Powered by Blogger.

    Blog Archive

    Pages