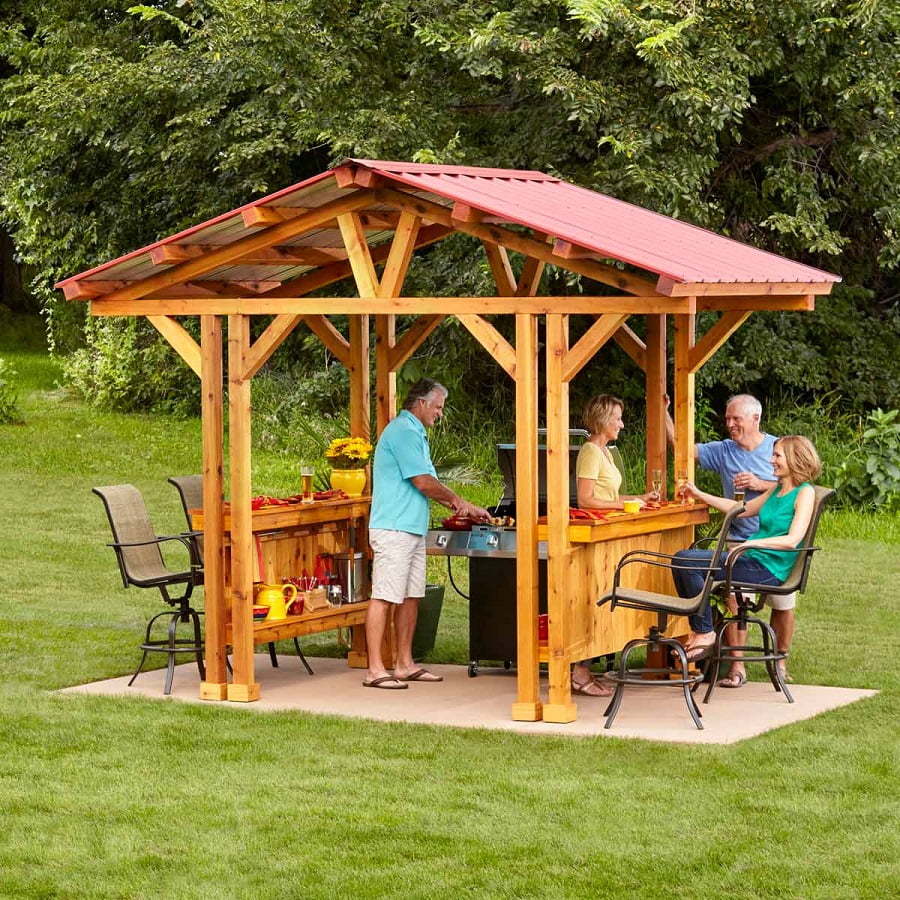
Build a Grill Gazebo with Extra Counter Space
Escape the elements and transform your backyard into an outdoor culinary haven with a grill gazebo that boasts ample countertop space. Imagine grilling up a feast while protected from the sun and rain, with convenient surfaces to prep your ingredients, rest your tools, and serve your delicious creations. This article will guide you step-by-step through the process of building your dream grill gazebo, complete with extra countertop space.
Planning Your Grill Gazebo
Before you dive into the construction, plan your grill gazebo meticulously to ensure it meets your needs and complements your outdoor space. Consider the following:
Size and Shape
Determine the ideal dimensions of your gazebo based on the size of your grill, the amount of countertop space you require, and the available space in your backyard. Opt for a shape that suits your aesthetic preferences and provides ample room for comfortable movement.
Materials
Choose materials that are durable, weather-resistant, and aesthetically pleasing. Common options include wood, metal, or a combination of both. Consider factors like budget, maintenance requirements, and the overall style of your outdoor space.
Features
Think about the features that will enhance your grilling experience. Besides the grill and countertop space, consider adding elements like a sink, storage shelves, a mini fridge, lighting, and fans for added convenience and comfort.
Budget
Set a realistic budget and stick to it. Remember to factor in the cost of materials, tools, and any professional labor you may need.
Gather Your Materials and Tools
Once you have a clear plan in place, gather the necessary materials and tools. Here's a comprehensive list to get you started:
- Gazebo frame components (wood or metal)
- Countertop materials (wood, stone, concrete, or composite)
- Roofing materials (metal, asphalt shingles, or fabric)
- Gazebo fabric or screens (for walls and roof)
- Hardware (screws, nails, bolts, brackets, etc.)
- Level
- Measuring tape
- Circular saw or jigsaw
- Drill
- Screwdriver
- Safety glasses
- Work gloves
- Other tools as needed based on your chosen materials and design
Constructing the Gazebo Frame
With your materials and tools ready, it's time to construct the frame of your gazebo. Follow these steps:
Building the Base
Begin by assembling the base of your gazebo. If you're using wood, cut the lumber to the desired dimensions and create a rectangular or square base frame. Secure the frame pieces using screws or nails, ensuring all corners are square and level.
Erecting the Posts
Attach the posts to the base frame, ensuring they are plumb and level. Use concrete or heavy-duty anchors to secure the posts to the ground for stability. You can also use pre-made gazebo post kits for a more streamlined process.
Building the Roof Frame
Assemble the roof frame according to your design. This may involve cutting and connecting beams and rafters. Ensure the roof frame is securely attached to the posts and is level. If you're using a gable roof, ensure the slope is sufficient for proper drainage.
Adding Countertop Space
Here's where you get to unleash your creativity and create the perfect grilling station. Here's how to add extra countertop space to your gazebo:
Determine Countertop Placement
Decide where you want your countertop space within the gazebo. Will it be on one side of the grill, or will you have a larger countertop along one side of the gazebo? Make sure the location is convenient for accessing your grill and prepping ingredients.
Prepare the Countertop Base
Depending on your materials and chosen design, you'll need to build a sturdy base for your countertop. This can involve attaching brackets to the posts, using wood beams, or creating a custom frame. Ensure the base is level and strong enough to support the countertop.
Install the Countertop
Secure the countertop to the base using screws or construction adhesive. You can use a variety of countertop materials, from sturdy butcher block to sleek granite. Ensure the countertop is flush with the gazebo frame and properly secured for safety.
Finishing Touches
With the gazebo frame and countertop in place, add the finishing touches to complete your outdoor haven:
- Install the roof: Secure your chosen roofing material, whether it's metal, shingles, or fabric, according to the manufacturer's instructions.
- Add walls and screens: Attach the gazebo fabric or screens to create walls and provide privacy or protection from insects.
- Include additional features: Add a sink, storage shelves, lighting, and fans to enhance the functionality and comfort of your grill gazebo.
- Personalize your space: Decorate your gazebo with plants, outdoor furniture, and accessories to reflect your personal style.
Enjoy Your New Grill Gazebo
Congratulations! You have successfully built a custom grill gazebo that will elevate your outdoor cooking and entertainment experience. Enjoy the convenience of extra countertop space, the protection of a roof, and the pleasure of grilling up delicious meals in a stylish and comfortable setting.


No comments:
Post a Comment
Note: only a member of this blog may post a comment.